Create a custom ec2 instance in AWS
Jacob Bills
May 5, 2020
Learn how to build a virtual machine and deploy it to AWS for running your own custom EC2 instance. I'm using VirtualBox 6.0.12 to create a CentOS 7.7 virtual machine. I tried deploying a CentOS 8 machine to AWS but it was not able to successfully create an AMI, so for this tutorial stick with CentOS 7.
In this blog
- Create a virtual machine
- Create and upload to S3 bucket
- Configure user permissions for AWS
- Create a custom AMI
- Create EC2 instance from custom AMI
- Verify EC2 instance customization
- VLOG
Create a virtual machine
During creation of the virtual machine make sure you select the VMDK (Virtual Machine Disk) hard disk file type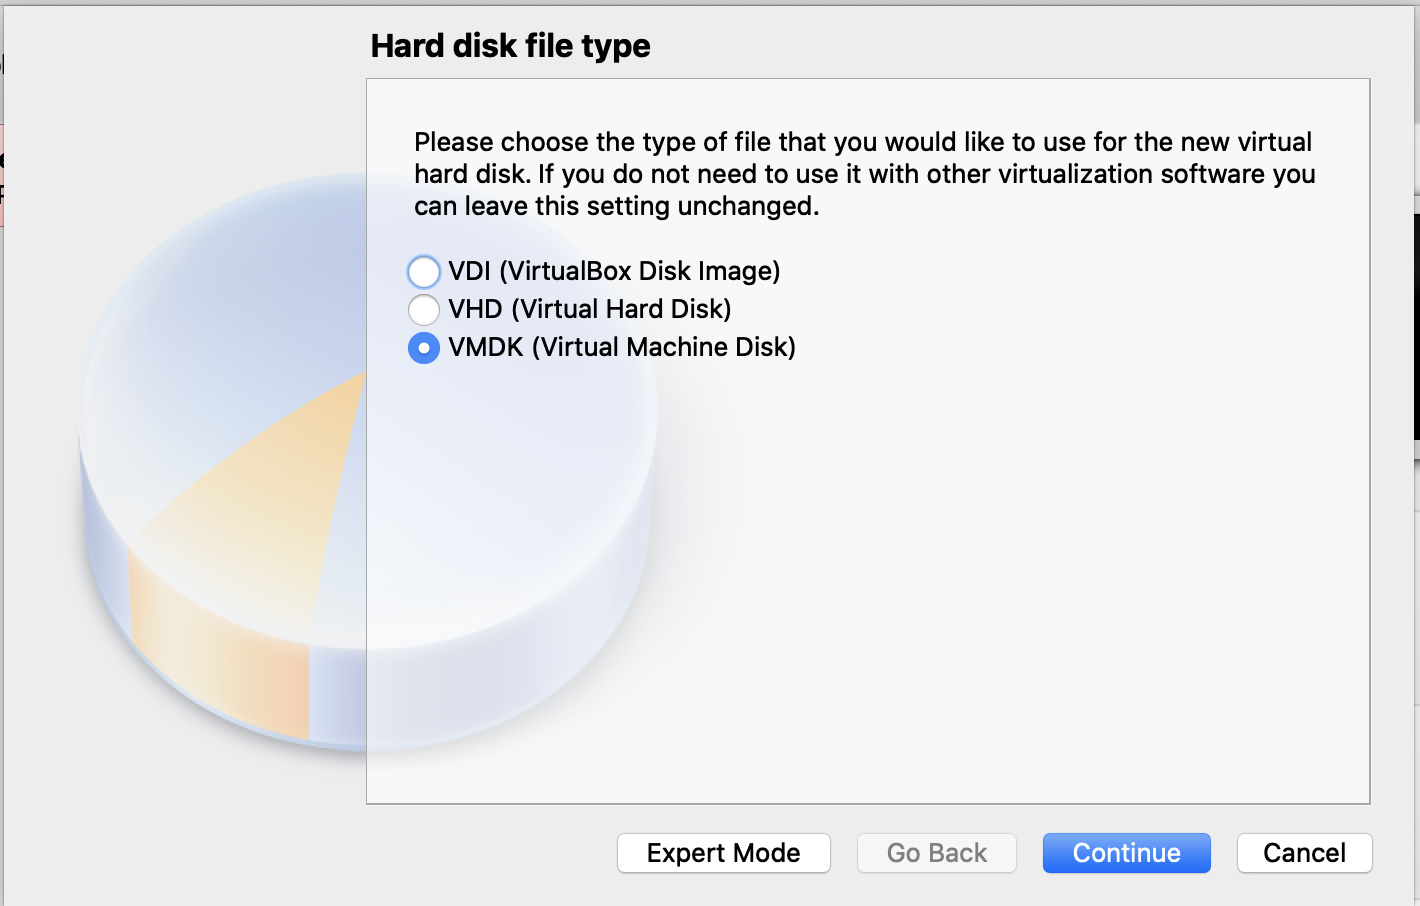
After installing CentOS we'll configure public/private key authentication in the machines authorized_keys file as a way to verify the ec2 instance properly reflects our customization.
Create new public/private key pair
#!/bin/bash
ssh-keygen -f id_rsa_vlog -t rsa -b 4096
#!/bin/bash
cat id_rsa_vlog.pub
#!/bin/bash
ssh -i id_rsa_vlog user@vmip
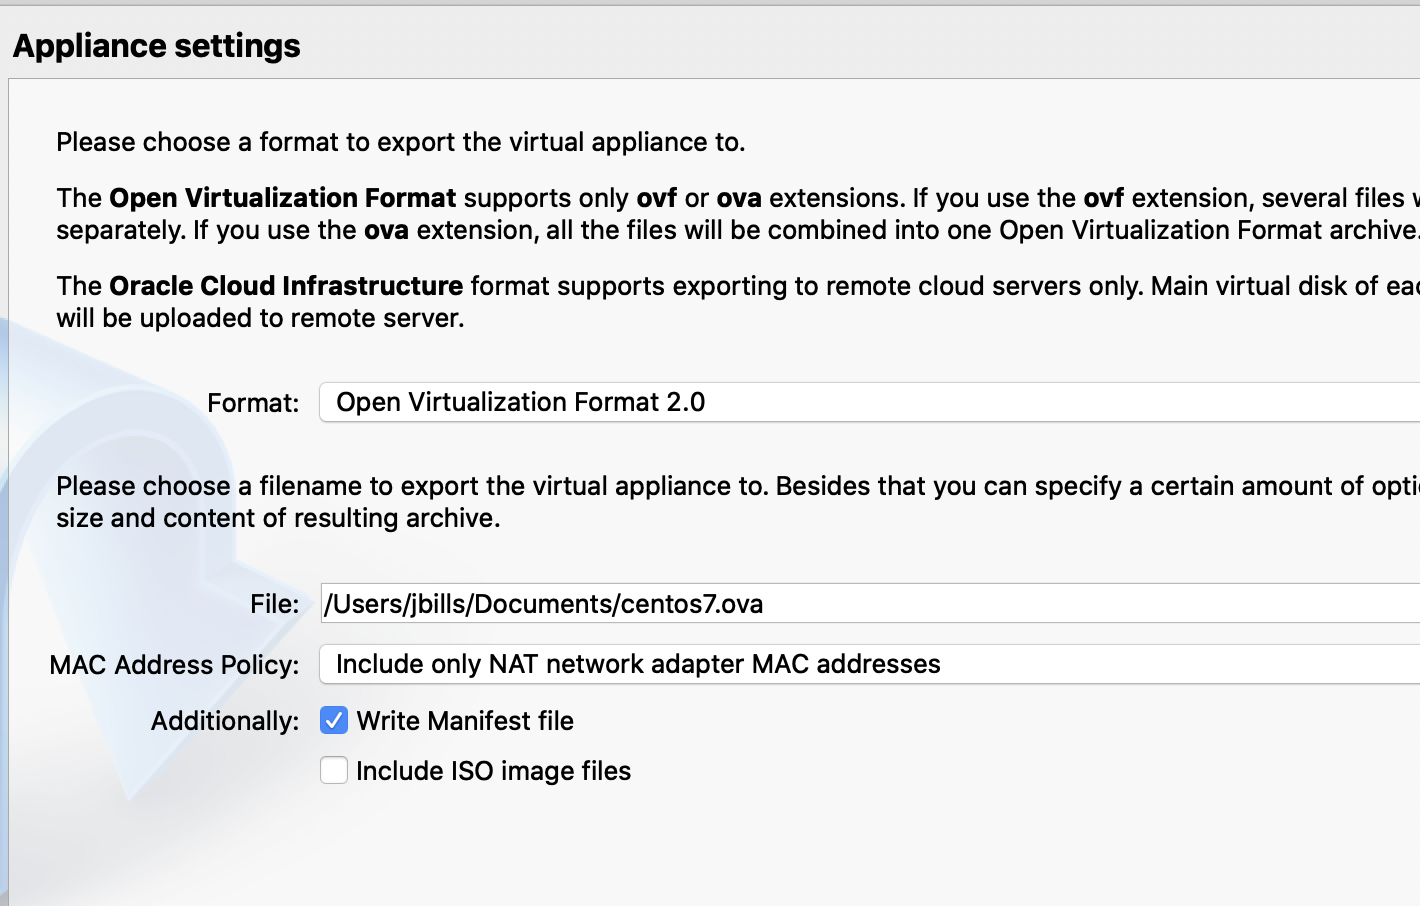
- Shutdown the virtual machine
- VirtualBox Menu > File > Export Appliance
- Export as Open Virtualization Format 2.0
Create and upload to S3 bucket
Create an s3 bucket to store the exported virtual machine. In this example an s3 bucket with the name bw-os-images is created.#!/bin/bash
aws s3api create-bucket --bucket bw-os-images
aws s3 cp /path/to/exported/centos7.ova s3://bw-os-images/
Configure user permissions for AWS
In order to upload the exported virtual machine you need to setup the appropriate user permissions for your IAM AWS user. You will need to create 3 files in order to do this- trust-policy.json
- role-policy.json
- ami-import.json
{
 "Version": "2012-10-17",
 "Statement": [
    {
       "Effect": "Allow",
       "Principal": { "Service": "vmie.amazonaws.com" },
       "Action": "sts:AssumeRole",
       "Condition": {
          "StringEquals":{
             "sts:Externalid": "vmimport"
          }
       }
    }
 ]
}
#!/bin/bash
aws iam create-role --role-name vmimport --assume-role-policy-document file://trust-policy.json
{
 "Version":"2012-10-17",
 "Statement":[
    {
       "Effect":"Allow",
       "Action":[
          "s3:GetBucketLocation",
          "s3:GetObject",
          "s3:ListBucket",
          "s3:PutObject",
          "s3:GetBucketAcl"
       ],
       "Resource":[
          "arn:aws:s3:::bw-os-images",
          "arn:aws:s3:::bw-os-images/*"
       ]
    },
    {
       "Effect":"Allow",
       "Action":[
          "ec2:ModifySnapshotAttribute",
          "ec2:CopySnapshot",
          "ec2:RegisterImage",
          "ec2:Describe*"
       ],
       "Resource":"*"
    }
 ]
}
#!/bin/bash
aws iam put-role-policy --role-name vmimport --policy-name vmimport --policy-document file://role-policy.json
Create a custom AMI
Create a file named ami-import.json[{
"Description": "CentOS 7.7 Base Image VLOG",
"Format": "ova",
"UserBucket": {
"S3Bucket": "bw-os-images",
"S3Key": "centos7.ova"
}
}]
#!/bin/bash
aws ec2 import-image --description "CentOS 7.7 Base Image VLOG" --disk-containers file://ami-import.json
#!/bin/bash
aws --output json ec2 describe-import-image-tasks --import-task-ids {{ImportTaskId}}
- active - The import task is in progress.
- deleting - The import task is being canceled.
- deleted - The import task is canceled.
- updating - Import status is updating.
- validating - The imported image is being validated.
- validated - The imported image was validated.
- converting - The imported image is being converted into an AMI.
- completed - The import task is completed and the AMI is ready to use.
Create EC2 instance from custom AMI
Finally, we can create an ec2 instance with this AMI's ImageId. Use the aws cli or the aws console to determine which security group and subnet your ec2 instance should belong in. You can list the ones that already exist for your account like this:#!/bin/bash
# get a list of subnets
aws ec2 describe-subnets
# get a list of security groups
aws ec2 describe-security-groups
#!/bin/bash
aws ec2 run-instances --image-id {{ImageId}} --tag-specifications 'ResourceType=instance,Tags=[{Key=Name,Value=YOURINSTANCENAME}]' --count 1 --instance-type t2.micro --security-group-ids {{SecurityGroupId}} --subnet-id {{SubnetId}}
#!/bin/bash
# no detail
aws ec2 describe-instance-status --instance-ids {{InstanceId}}
# detailed
aws ec2 describe-instances --instance-ids {{InstanceId}}
Verify EC2 instance customization
Verify the ec2 instance is running with the custom AMI by authenticating with the public key that was created earlier. If authentication is successfull (and your virtual machine is properly configured with the public key) then you've just deployed your first ec2 instance with your very own AMI#!/bin/bash
ssh -i id_rsa_vlog root@ec2host